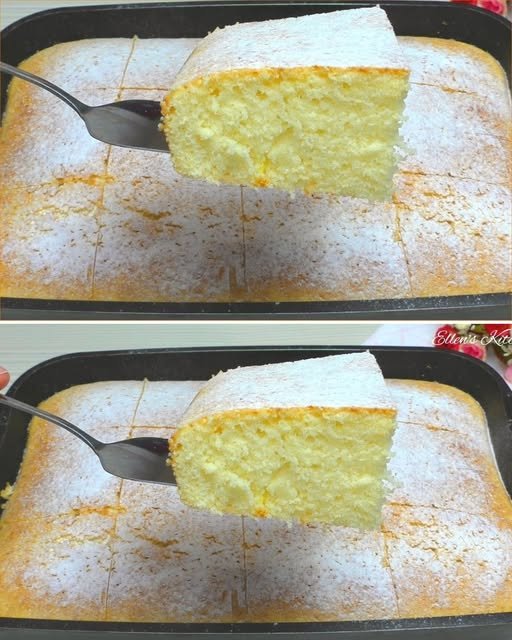
Hot Milk Pie
Ingredients
- 4 large eggs
- 1 cup (200 g) granulated sugar
- 2 ¾ cups (350 g) all-purpose flour
- 2 teaspoons baking powder
- A pinch of salt
- 5 tablespoons (70 g) butter
- 1 cup (240 ml) milk
- 1 teaspoon vanilla sugar or extract
Ingredient Notes
Using fresh eggs helps in achieving the fluffiest batter. If vanilla sugar isn’t available, vanilla extract works just as well and adds a lovely aroma. You can adjust the sugar slightly if you prefer a less sweet pie.
Kitchen Tools Needed
- Mixing bowls
- Hand or stand mixer
- Saucepan
- Baking pan (32×20 cm / 13×9 inch)
- Spatula
- Whisk
Step-by-Step Instructions
- Preheat your oven to 180°C (356°F).
- In a mixing bowl, beat the eggs and sugar together until the mixture is fluffy and light.
- Gradually add the flour, baking powder, and a pinch of salt to the egg mixture, mixing well after each addition.
- In a saucepan, gently heat the milk, butter, and vanilla sugar over low heat until the butter melts completely.
- Pour the warm milk mixture into the batter in two additions, stirring continuously until everything is well combined and smooth.
- Grease your baking pan and pour the batter evenly into it.
- Bake in the preheated oven for 35-40 minutes, or until the pie is golden brown and set in the middle. You can check with a toothpick—if it comes out clean, it’s ready!
- Allow the pie to cool in the pan before slicing it into squares and serving. The pie is delicious warm or at room temperature.
Pro Tips
- Make sure your ingredients, especially eggs and milk, are at room temperature for better mixing and texture.
- If the top of your pie browns too quickly while baking, you can cover it loosely with aluminum foil.
- Allowing the pie to cool thoroughly before cutting helps it set better and makes slicing easier.
Common Mistakes
- Overmixing the batter can lead to a dense pie. Mix just until combined.
- Ensure the baking powder is fresh; expired baking powder can result in a flat pie.
- Leaving the pie in the oven too long will make it dry, so start checking for doneness a few minutes before the time is up.
Variations
- Chocolate Chip Hot Milk Pie: Fold in semi-sweet chocolate chips before baking for an indulgent twist.
- Coconut Cream Pie: Add shredded coconut to the batter for a tropical flavor.
- Fruit Topping: Serve with a layer of cooked fruit compote on top for added flavor.
- Spiced Version: Add a teaspoon of cinnamon or nutmeg for a warm, spiced flavor profile.
Serving Suggestions
This pie can be served on its own or paired with a dollop of whipped cream. Fresh berries or a scoop of vanilla ice cream also complement its rich flavor nicely.
Storage Instructions
Store any leftovers in an airtight container in the refrigerator for up to 3 days. Be sure to let it cool completely before sealing.
Reheating Tips
To enjoy leftovers, reheat individual slices in the microwave for about 15-20 seconds or until warmed through. It can also be served cold, as it’s delicious at any temperature!
Nutrition Estimate
Approximate values per serving:
- Calories: 250
- Protein: 4 g
- Carbohydrates: 32 g
- Fat: 12 g
Recipe Summary
- Prep Time: 15 minutes
- Cook Time: 35-40 minutes
- Total Time: 55-60 minutes
- Servings: 8-10
- Cuisine: American
- Course: Dessert
- Calories: 250
Frequently Asked Questions
Can I make this pie ahead of time?
Yes, it can be made a day in advance and stored covered in the refrigerator.
What can I use instead of vanilla sugar?
Vanilla extract is a great substitute—use 1 teaspoon in place of the vanilla sugar.
Is this pie gluten-free?
No, this recipe contains flour. However, you can experiment with a gluten-free flour blend.
How do I store leftovers?
Keep leftovers in an airtight container in the fridge for up to 3 days.
Enjoy making this Hot Milk Pie! With its simple ingredients and easy preparation, it’s sure to become a favorite in your baking repertoire.