
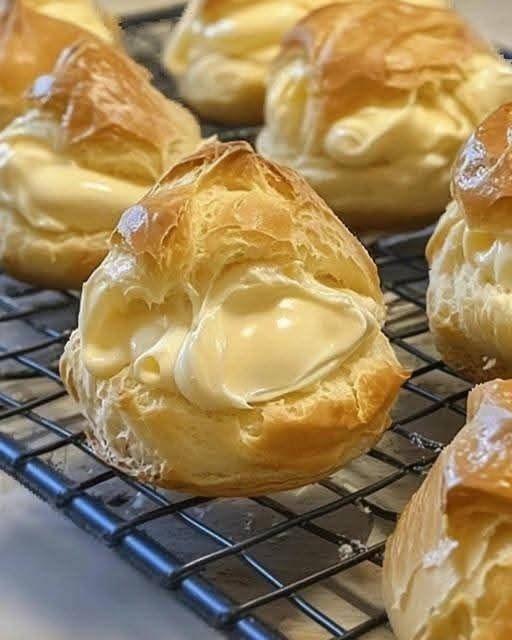
A Classic French Dessert You Can Make at Home
Homemade Vanilla Cream Puffs
Few desserts are as elegant and satisfying as homemade cream puffs. With their crisp, golden choux pastry shells and luscious vanilla custard filling, these classic French pastries are surprisingly easy to make at home. Although they look like something you’d find in a high-end bakery, cream puffs require only a handful of basic ingredients and a little patience.
The magic of cream puffs lies in the contrast between the light, airy pastry and the rich, silky filling. As the dough bakes, steam creates a hollow center that’s perfect for filling with creamy custard, whipped cream, or even chocolate mousse. Finished with a dusting of powdered sugar or a drizzle of melted chocolate, they’re an irresistible dessert for holidays, birthdays, afternoon tea, or any special occasion.
Whether you’re an experienced baker or trying choux pastry for the first time, this foolproof recipe will guide you through every step to ensure perfect results every time.
Why You’ll Love This Recipe
- Crisp, airy pastry shells
- Rich homemade vanilla custard
- Bakery-quality results at home
- Simple pantry ingredients
- Perfect for entertaining
- Easy to customize with different fillings
Ingredients
For the Choux Pastry
- 1 cup (240 ml) water
- ½ cup (115 g) unsalted butter
- 1 tablespoon granulated sugar
- ¼ teaspoon salt
- 1 cup (125 g) all-purpose flour
- 4 large eggs
For the Vanilla Custard Filling
- 2 cups (480 ml) whole milk
- 4 egg yolks
- ½ cup (100 g) granulated sugar
- ¼ cup (30 g) cornstarch
- Pinch of salt
- 2 teaspoons vanilla extract
Optional Toppings
- Powdered sugar
- Melted dark or milk chocolate
- Caramel sauce
- Fresh berries
Instructions
Step 1: Prepare the Choux Pastry
Preheat your oven to 425°F (220°C).
Line two baking sheets with parchment paper.
In a medium saucepan, combine the water, butter, sugar, and salt.
Bring the mixture to a gentle boil over medium heat.
Once the butter has completely melted, add the flour all at once.
Using a wooden spoon, stir vigorously until the dough forms a smooth ball and pulls away from the sides of the pan.
Continue cooking the dough for about 1–2 minutes, stirring constantly to remove excess moisture.
Transfer the dough to a large mixing bowl and allow it to cool for about 5 minutes.
Step 2: Add the Eggs
Add the eggs one at a time, mixing thoroughly after each addition.
At first, the dough may appear separated or lumpy, but continue mixing. After the final egg is incorporated, the dough should become smooth, glossy, and thick enough to slowly fall from a spoon in a V-shaped ribbon.
This consistency is essential for creating cream puffs that rise beautifully and develop their signature hollow centers.
Transfer the dough to a piping bag fitted with a large round tip, or simply use two spoons.
Pipe or scoop mounds approximately 1½ inches wide onto the prepared baking sheets, leaving space between each puff for expansion.
If desired, lightly dampen your fingertip with water and smooth any pointed peaks on top of the dough.
Step 3: Bake the Cream Puffs
Place the baking sheets in the preheated oven.
Bake at 425°F (220°C) for 10 minutes.
Without opening the oven door, reduce the temperature to 375°F (190°C) and continue baking for 20–25 minutes, or until the cream puffs are deeply golden brown and feel light when lifted.
The shells should appear crisp and dry.
Once baked, remove the trays from the oven.
Using a small knife or skewer, carefully pierce a small hole in the side of each puff.
This allows steam to escape and prevents the pastries from becoming soggy.
Transfer the cream puffs to a wire rack and allow them to cool completely.
Step 4: Prepare the Vanilla Custard Filling
While the pastry shells cool, prepare the creamy vanilla custard.
Heat the milk in a medium saucepan over medium heat until steaming but not boiling.
Meanwhile, whisk together the egg yolks, sugar, cornstarch, and salt until smooth and pale.
Slowly pour a small amount of the hot milk into the egg mixture while whisking constantly.
This process, called tempering, prevents the eggs from scrambling.
Gradually whisk in the remaining milk.
Return the mixture to the saucepan and cook over medium heat, whisking continuously until the custard thickens and begins to bubble gently.
Remove from the heat and stir in the vanilla extract.
Transfer the custard to a clean bowl and press plastic wrap directly onto the surface to prevent a skin from forming.
Allow it to cool completely, then refrigerate for at least 1 hour.
Step 5: Fill the Cream Puffs
Once both the pastry shells and custard have cooled completely, fill a piping bag fitted with a small round tip with the chilled custard.
Insert the tip into the hole in each cream puff and gently pipe in the filling until the shell feels slightly heavy.
Avoid overfilling, as too much custard can soften the pastry.
Alternatively, slice each puff in half horizontally and spoon or pipe the custard inside before replacing the top.
Step 6: Decorate and Serve
Dust the tops generously with powdered sugar for a classic finish.
For extra indulgence, drizzle with melted chocolate, caramel sauce, or a simple vanilla glaze.
Garnish with fresh berries if desired.
Serve immediately for the best texture and flavor.
Delicious Variations
Chocolate Cream Puffs
Mix melted dark chocolate into the cooled custard for a rich chocolate filling.
Whipped Cream Filling
Replace the custard with lightly sweetened whipped cream for a lighter dessert.
Coffee Cream Puffs
Add 1 teaspoon instant espresso powder to the warm custard for a subtle coffee flavor.
Berry Cream Puffs
Fold chopped strawberries, raspberries, or blueberries into the chilled custard before filling.
Chocolate-Dipped Cream Puffs
Dip the tops of the baked cream puffs into melted chocolate and allow it to set before serving.
Tips for Perfect Cream Puffs
- Measure ingredients accurately for the best results.
- Cook the dough long enough to remove excess moisture.
- Add the eggs one at a time and mix thoroughly.
- Never open the oven during the first stage of baking.
- Pierce each puff after baking to release trapped steam.
- Cool the pastry completely before filling.
Frequently Asked Questions
Why did my cream puffs collapse?
They were likely underbaked or the oven door was opened too early during baking. The shells should be deep golden brown and dry before removing them from the oven.
Can I freeze cream puffs?
Yes. Freeze the baked, unfilled shells in an airtight container for up to 2 months. Thaw at room temperature and fill just before serving.
Can I make them ahead?
Absolutely. The pastry shells and custard can both be prepared 1–2 days in advance and assembled shortly before serving.
Do I need a stand mixer?
No. A sturdy wooden spoon or hand mixer works perfectly well.
Storage
Filled cream puffs are best enjoyed the same day but can be refrigerated in an airtight container for up to 2 days.
Unfilled pastry shells can be stored at room temperature for 1 day or frozen for up to 2 months.
The vanilla custard can be made 2 days ahead and kept refrigerated until ready to use.
Final Thoughts
Homemade Vanilla Cream Puffs are a timeless dessert that never goes out of style. Their crisp, golden choux pastry and silky vanilla custard create the perfect combination of textures and flavors, making them ideal for everything from elegant dinner parties to casual family gatherings.
Although they may seem intimidating at first, cream puffs are surprisingly approachable with the right technique. Once you’ve mastered this classic recipe, you’ll be able to experiment with endless fillings and toppings, creating bakery-worthy pastries whenever the craving strikes.
Fresh, light, and irresistibly delicious, these homemade cream puffs are sure to become one of your favorite desserts—and one you’ll return to again and again.