
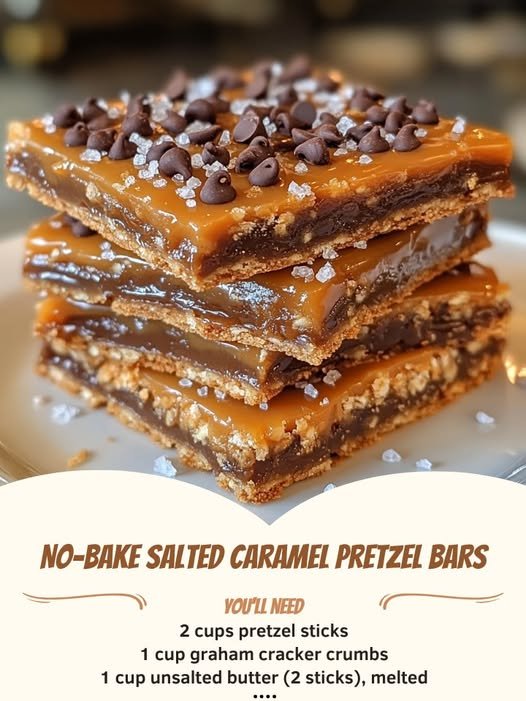
No-Bake Pretzel Bars with Salted Caramel: A Sweet & Salty Delight
If you’ve ever dreamed of a dessert that perfectly balances sweet and salty, crunchy and chewy, then these No-Bake Pretzel Bars with Salted Caramel are made for you. They are indulgent yet simple, and best of all, there’s no oven required! Perfect for a quick dessert, a party treat, or just a sweet snack, these bars are as easy to make as they are irresistible.
Ingredients
For the base:
- 2 cups pretzels, crushed (keep some pieces larger for extra crunch)
- 1 cup unsalted butter, melted
- 1/4 cup granulated sugar
For the caramel layer:
- 1 can (14 oz) sweetened condensed milk
- 1/2 cup unsalted butter
- 1 cup brown sugar, packed
- 1/4 cup light corn syrup
- 1 teaspoon vanilla extract
- 1/2 teaspoon sea salt
For the chocolate topping:
- 1 cup semi-sweet chocolate chips
- 2 tablespoons heavy cream
Optional: extra flaky sea salt for garnish
Step-by-Step Method
Step 1: Prepare the Pretzel Base
- Line an 8×8-inch square baking pan with parchment paper, leaving a little overhang for easy removal.
- Crush 2 cups of pretzels in a food processor or place them in a zip-top bag and gently crush with a rolling pin. Keep a few larger pieces for added texture.
- In a medium bowl, mix the crushed pretzels with melted butter and granulated sugar until well combined.
- Press this mixture evenly into the prepared pan to form a firm base. A flat-bottomed glass works well to compact it tightly.
- Chill the base in the refrigerator for 10–15 minutes to set while you prepare the caramel layer.
Step 2: Make the Salted Caramel Layer
- In a medium saucepan, combine the sweetened condensed milk, butter, brown sugar, and corn syrup over medium heat.
- Stir constantly with a heat-resistant spatula or wooden spoon to prevent burning.
- Allow the mixture to come to a gentle boil, then reduce heat to low and simmer for 5–7 minutes until thickened and glossy.
- Remove from heat and stir in vanilla extract and sea salt. Taste and adjust salt as desired.
- Pour the caramel over the chilled pretzel base and spread evenly. Return to the fridge for 15–20 minutes to firm up slightly.
Step 3: Add the Chocolate Topping
- In a microwave-safe bowl, combine chocolate chips and heavy cream. Microwave in 20-second intervals, stirring in between, until smooth and fully melted.
- Pour the chocolate over the caramel layer and spread evenly with a spatula.
- Optional: sprinkle a pinch of flaky sea salt over the chocolate for an extra salty-sweet punch.
- Chill the bars in the refrigerator for at least 1 hour, or until fully set.
Step 4: Cut and Serve
- Once fully chilled, lift the bars out of the pan using the parchment paper overhang.
- Use a sharp knife to cut into squares or rectangles. For clean cuts, warm the knife under hot water and dry it before slicing.
- Serve immediately or store in an airtight container in the fridge for up to a week.
Tips for Perfect Bars
- Crunch Factor: Don’t crush all the pretzels too finely—keeping chunks adds a fun crunch.
- Salt Balance: Taste the caramel before pouring; a little more sea salt can enhance the flavor.
- Chocolate Variations: Try milk chocolate or a mix of milk and dark chocolate for variety.
- Make Ahead: These bars are perfect to make a day in advance as chilling enhances the layers’ textures.
Why You’ll Love These Bars
The magic of these No-Bake Pretzel Bars with Salted Caramel lies in the combination of textures and flavors:
- Crunchy pretzel base that provides a sturdy, salty foundation
- Gooey, buttery caramel that melts in your mouth
- Smooth chocolate topping that adds a decadent finish
Each bite delivers a delightful contrast of sweet and salty, soft and crunchy—a treat that’s both comforting and impressively elegant for any occasion.
If you want, I can also create a visual step-by-step guide with images for each stage, so it’s almost impossible to make a mistake while preparing these bars. It would look like a professional recipe tutorial.
Do you want me to make that?