
Creamy Lemon Squares: A Step-by-Step Guide to Tangy-Sweet Perfection
If you love desserts that strike the perfect balance between tart and sweet, Creamy Lemon Squares are an irresistible treat. With a buttery crust, a luscious lemon custard filling, and a delicate dusting of powdered sugar, these squares are perfect for any occasion—from casual afternoon tea to festive gatherings. Here’s how to make them from scratch, step by step.
Ingredients
For the Crust:
- 1 cup (230 g) unsalted butter, softened
- 1/2 cup (100 g) granulated sugar
- 2 cups (250 g) all-purpose flour
- 1/4 teaspoon salt
For the Lemon Filling:
- 4 large eggs
- 1 1/2 cups (300 g) granulated sugar
- 1/4 cup (30 g) all-purpose flour
- 2 tablespoons lemon zest (about 2 medium lemons)
- 1/2 cup (120 ml) freshly squeezed lemon juice (about 2–3 lemons)
- 1/4 teaspoon salt
- 1/2 cup (120 ml) heavy cream or half-and-half for extra creaminess
For Topping (Optional):
- Powdered sugar for dusting
Step-by-Step Method
Step 1: Prepare the Crust
- Preheat the oven: Set it to 350°F (175°C) and line a 9×13-inch baking pan with parchment paper, leaving some overhang for easy removal.
- Cream the butter and sugar: In a large mixing bowl, use a hand mixer or stand mixer to beat the softened butter and sugar until light and fluffy, about 2–3 minutes.
- Incorporate dry ingredients: Add the flour and salt gradually and mix on low speed until the dough just comes together. Avoid overmixing; you want a tender, buttery crust.
- Press into the pan: Spread the dough evenly into the prepared pan, pressing it firmly into the corners.
- Bake the crust: Place it in the preheated oven and bake for 15–20 minutes, or until lightly golden. Remove from the oven and allow it to cool slightly while you prepare the filling.
Step 2: Make the Lemon Filling
- Whisk eggs and sugar: In a medium bowl, combine the eggs and sugar. Whisk until the mixture is smooth and slightly pale.
- Add flour and lemon zest: Sprinkle in the flour and lemon zest, whisking gently until no lumps remain.
- Incorporate lemon juice and cream: Gradually whisk in the fresh lemon juice and cream. Finally, add a pinch of salt to balance the sweetness.
- Blend until smooth: Make sure the filling is silky and fully combined—this ensures a creamy, custard-like texture after baking.
Step 3: Assemble and Bake
- Pour the filling over the crust: Spread the lemon mixture evenly over the pre-baked crust.
- Bake the assembled squares: Return the pan to the oven and bake at 350°F (175°C) for 25–30 minutes, or until the filling is set but still slightly jiggly in the center. Overbaking can make the filling dry.
- Cool completely: Remove from the oven and allow the lemon squares to cool at room temperature. Then refrigerate for at least 1–2 hours to set fully. This chilling step ensures clean cuts when slicing.
Step 4: Slice and Serve
- Lift from the pan: Use the parchment paper overhang to gently lift the lemon squares from the pan.
- Dust with powdered sugar: For a beautiful finishing touch, sprinkle a light layer of powdered sugar on top.
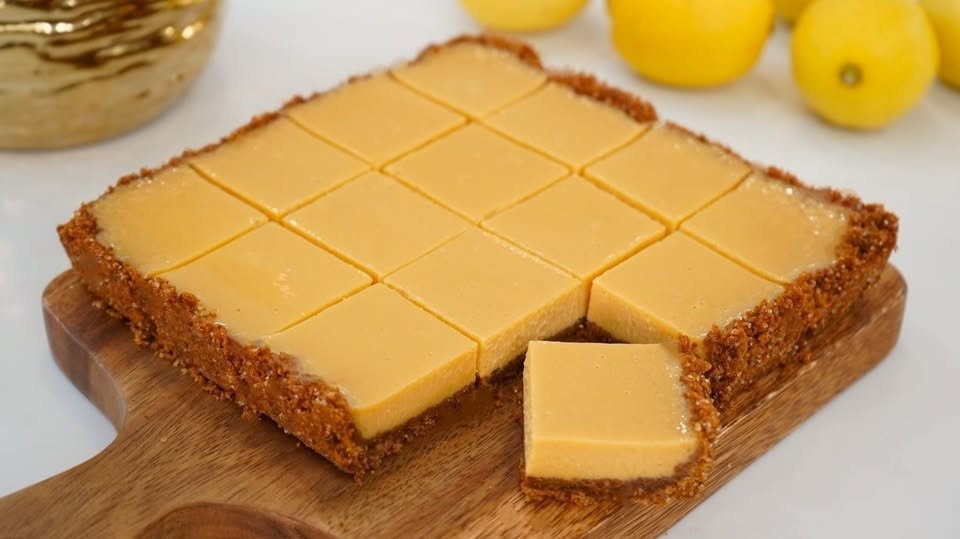
- Cut into squares: Using a sharp knife, slice into 2-inch squares for perfect portion sizes. Wipe the knife clean between cuts for neat edges.
Tips for Perfect Lemon Squares
- Use fresh lemons: Bottled lemon juice cannot replicate the bright, tangy flavor of fresh lemons.
- Room temperature eggs and butter: This ensures a smoother filling and crust.
- Don’t overbake: The filling should be creamy, not dry. A slight jiggle in the center is perfect.
- Optional garnish: Fresh lemon zest or thin lemon slices can add a decorative, flavorful touch.
Conclusion
These Creamy Lemon Squares are the ultimate combination of buttery, tangy, and sweet. They’re easy to make yet impressively elegant, making them perfect for any occasion. Whether you serve them chilled straight from the fridge or at room temperature with a cup of tea, they are sure to become a favorite dessert in your home.
If you want, I can also create a shorter, printable version with visual cues and tips to make it even easier to follow in the kitchen. It’s perfect for framing in your recipe binder.
Do you want me to do that?