
Easy Homemade Crunch Bars Recipe: A Sweet, Crispy Treat
There’s nothing quite like a homemade candy bar: sweet, crunchy, and perfect for satisfying any chocolate craving. This Easy Homemade Crunch Bars Recipe combines crispy rice cereal, creamy chocolate, and a touch of caramel for a treat that’s simple to make yet impressively delicious. With just a few ingredients and easy steps, you can whip up these bars in no time. Let’s dive in!
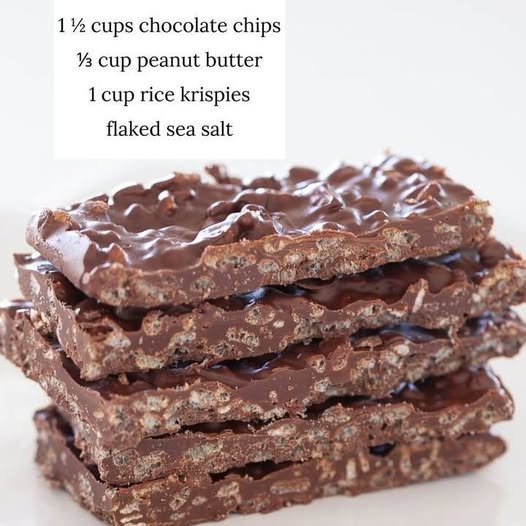
Ingredients You’ll Need
- 3 cups crispy rice cereal – This gives your bars that iconic crunch.
- 1 cup semisweet chocolate chips – You can also use milk chocolate for a sweeter taste.
- 1/2 cup peanut butter (smooth or crunchy) – Adds creaminess and flavor.
- 1/2 cup honey or corn syrup – Helps bind the bars together.
- 1 teaspoon vanilla extract – For a subtle, warm aroma.
- Optional toppings: Sprinkles, crushed nuts, or extra chocolate drizzle.
Step-by-Step Instructions
Step 1: Prepare Your Pan
Start by lining an 8×8-inch square baking pan with parchment paper. This will make it easy to lift the bars out later and prevent sticking. Lightly grease the paper with butter or cooking spray for extra ease.
Step 2: Melt the Chocolate and Peanut Butter
In a medium saucepan, combine the chocolate chips, peanut butter, and honey (or corn syrup).
- Heat over low to medium heat, stirring constantly to prevent burning.
- Once the mixture is smooth and glossy, remove it from the heat.
- Stir in the vanilla extract.
Pro tip: If the mixture seems too thick, add a teaspoon of milk to loosen it slightly.
Step 3: Mix in the Crispy Rice Cereal
Place the crispy rice cereal in a large mixing bowl.
- Pour the warm chocolate-peanut butter mixture over the cereal.
- Use a spatula or wooden spoon to fold the mixture gently but thoroughly, ensuring every piece of cereal is coated evenly.
Step 4: Transfer to the Pan
Pour the cereal-chocolate mixture into the prepared pan.
- Use the spatula to press it down evenly, making sure it’s compacted for easy cutting later.
- If desired, sprinkle toppings like chopped nuts or chocolate drizzle on top and gently press them in.
Step 5: Chill and Set
Place the pan in the refrigerator for at least 1–2 hours to allow the bars to firm up.
- For quicker results, you can freeze for 30–40 minutes.
- Avoid leaving them at room temperature for too long, as the chocolate can soften and make cutting messy.
Step 6: Cut into Bars
Once firm, lift the mixture out of the pan using the parchment paper.
- Place it on a cutting board and cut into squares or rectangles with a sharp knife.
- For clean edges, warm the knife slightly under hot water and wipe dry before each cut.
Step 7: Store or Enjoy
- Store the bars in an airtight container at room temperature for up to 5 days, or in the fridge for up to 2 weeks.
- They also freeze well for longer storage—just wrap individually in parchment paper or foil.
Tips for Perfect Crunch Bars
- Use fresh cereal – Stale rice cereal can make the bars chewy instead of crispy.
- Don’t overheat the chocolate – Chocolate can seize if it gets too hot. Always melt slowly and stir constantly.
- Get creative – Try adding mini marshmallows, dried fruits, or a swirl of caramel for extra flavor.
- Even pressing – Compacting the mixture evenly helps the bars hold together better.
Why These Crunch Bars Are Special
Unlike store-bought candy bars, these homemade crunch bars are customizable, preservative-free, and perfect for satisfying chocolate cravings at home. They strike the perfect balance of sweet, salty, and crunchy, making them a favorite for kids, adults, and anyone who loves chocolatey treats. Plus, they’re a fun no-bake project that anyone can tackle in under 30 minutes.
Enjoy these bars as a snack, dessert, or a gift for friends and family! With their crisp texture and rich chocolate-peanut butter flavor, these Easy Homemade Crunch Bars will disappear fast.
If you want, I can also create a version with a caramel layer and chocolate drizzle on top to make it extra decadent and restaurant-quality. Do you want me to do that?