
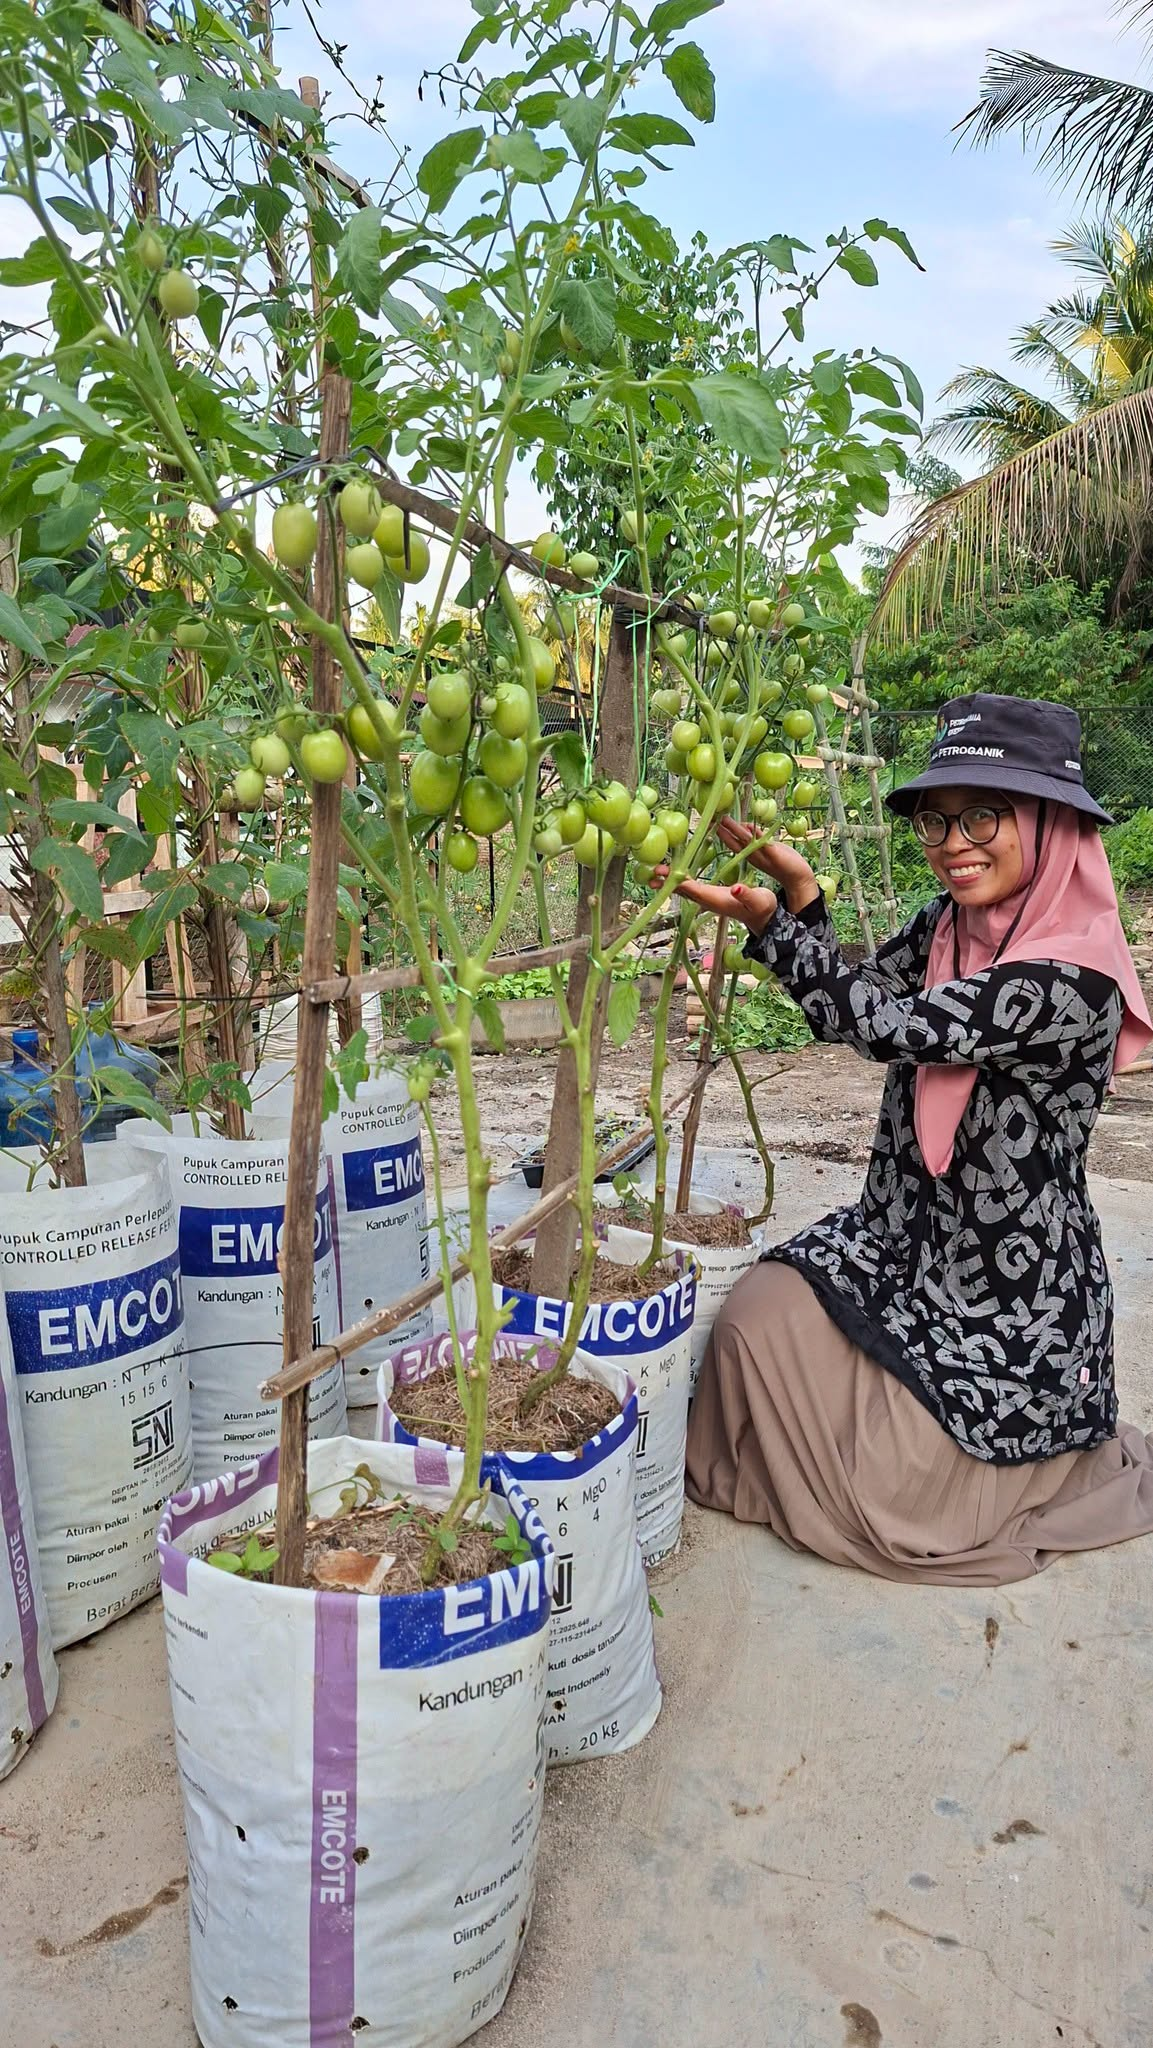
How to Grow Tomatoes in Used Bags for a Huge Harvest
Growing tomatoes in recycled fertilizer or feed bags is an inexpensive, space-saving method that produces excellent yields. The bags shown in the image work well because they provide enough root space, good drainage, and are easy to move if needed.
Materials Needed
- Used fertilizer or feed bags (20–25 kg size)
- Rich garden soil
- Well-rotted compost or aged manure
- Rice husks, coco peat, or sand (for drainage)
- Tomato seedlings (25–30 days old)
- Bamboo stakes or trellis
- Mulch (straw or dried grass)
- Organic or balanced tomato fertilizer
- Watering can
Step 1: Prepare the Bags
- Wash the used bags thoroughly.
- Punch 8–12 drainage holes in the bottom and a few around the lower sides.
- Fold the top edge down to strengthen the bag.
- Place the bags in a sunny location that receives 6–8 hours of direct sunlight daily.
Step 2: Prepare the Potting Mix
Mix:
- 50% fertile garden soil
- 30% compost or aged manure
- 20% rice husks, coco peat, or coarse sand
You can also mix in:
- 1 handful bone meal
- 1 handful wood ash
- 1 handful organic tomato fertilizer
Fill each bag about ¾ full, leaving space for watering.
Step 3: Plant the Seedlings
- Dig a deep hole in the center.
- Remove the lower leaves from the seedling.
- Plant it deeper than it was in the nursery pot, burying part of the stem.
- Water immediately after planting.
Plant only one tomato plant per bag for the best growth.
Step 4: Install Support
Insert a 5–6 ft (1.5–1.8 m) bamboo stake beside each plant or use a trellis.
Tie the stem loosely with soft string as the plant grows.
Step 5: Water Properly
- Water deeply every morning.
- During hot weather, water once more in the late afternoon if needed.
- Keep the soil consistently moist but never waterlogged.
Avoid wetting the leaves to reduce fungal diseases.
Step 6: Fertilize Regularly
Feed every 10–14 days with:
- Compost tea
- Fish emulsion
- Liquid seaweed
- Balanced tomato fertilizer (such as 10-10-10)
Once flowering begins, switch to a fertilizer higher in potassium to encourage fruit production.
Step 7: Prune for Better Yields
- Remove the small side shoots (suckers) that grow between the main stem and branches.
- Remove yellow or diseased leaves.
- Trim lower leaves that touch the soil to improve airflow.
This helps the plant direct more energy into producing fruit.
Step 8: Mulch the Soil
Cover the soil with:
- Straw
- Dry leaves
- Grass clippings
Mulch helps:
- Retain moisture
- Suppress weeds
- Keep roots cool
- Reduce watering frequency
Step 9: Pollination Tips
When flowers appear:
- Gently shake the plant every morning.
- Or tap the flower clusters lightly.
This improves pollination and increases fruit set, especially in calm weather.
Step 10: Harvest
Tomatoes are ready when they:
- Turn fully red (or the variety’s mature color)
- Feel firm but slightly soft
- Detach easily from the vine
Harvest regularly to encourage continuous fruit production.
Tips for Maximum Tomato Production
🍅 Give plants 6–8 hours of sunlight every day.
🍅 Water consistently to prevent fruit cracking.
🍅 Rotate the bags each season to reduce disease buildup.
🍅 Remove damaged or diseased leaves immediately.
🍅 Feed regularly once flowering starts.
🍅 Support heavy branches to prevent breakage.
🍅 Pick ripe tomatoes often to stimulate new fruit development.
Why Grow Tomatoes in Used Bags?
- ♻️ Recycles waste materials
- 💰 Very low cost
- 🌱 Ideal for small gardens, patios, and balconies
- 🚜 Easy to move if weather changes
- 💧 Excellent drainage
- 🍅 Can produce 8–20 lbs (4–9 kg) of tomatoes per healthy plant, depending on the variety and care
With proper watering, feeding, pruning, and plenty of sunlight, used bags can produce vigorous tomato plants loaded with delicious, homegrown tomatoes all season long.