
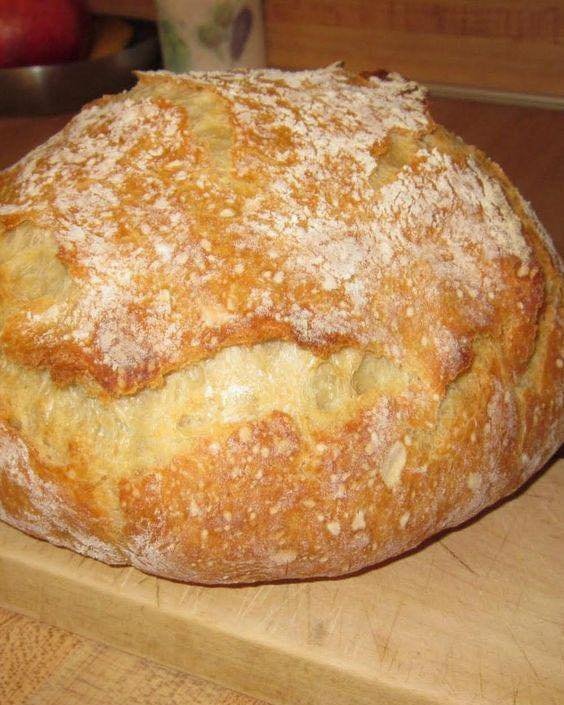
Few things in the kitchen are as magical as pulling a loaf of crusty bread from the oven—golden, crackly on the outside, soft and airy on the inside. This Dutch oven bread method delivers bakery-style results at home with minimal effort and no special equipment. The secret lies in steam, time, and a blazing-hot pot that transforms simple ingredients into an irresistible loaf.
This recipe is perfect for beginners and seasoned bakers alike. No kneading, no stand mixer, and no stress—just patience and a Dutch oven.
Why Bake Bread in a Dutch Oven?
A Dutch oven traps steam released from the dough during baking. This steam keeps the crust soft at first, allowing the bread to rise fully. Once the lid is removed, the crust crisps up beautifully, creating that deep golden color and signature crackle you normally only get from professional ovens.
Ingredients You’ll Need
- 3 cups all-purpose flour
- 1½ teaspoons salt
- ½ teaspoon active dry yeast
- 1½ cups warm water
That’s it. Just four humble ingredients working together to create something extraordinary.
Step-by-Step Method
Step 1: Mix the Dough
In a large bowl, combine the flour, salt, and yeast. Pour in the warm water and stir with a wooden spoon or spatula until a shaggy, sticky dough forms. Do not knead—the rough texture is exactly what you want.
Cover the bowl tightly with plastic wrap or a clean kitchen towel.
Step 2: Let the Dough Rest
Leave the dough at room temperature for 12 to 18 hours. During this long rest, the yeast slowly ferments, developing deep flavor and creating air bubbles that will give the bread its chewy interior.
When ready, the dough should look bubbly and slightly puffy with a sticky surface.
Step 3: Shape the Dough
Lightly flour your work surface and turn out the dough. With floured hands, gently fold the dough over itself a few times to form a rough ball. Don’t press out the air—those bubbles are precious.
Place the dough on a piece of parchment paper, seam side down.
Step 4: Preheat the Dutch Oven
Place your Dutch oven (with the lid on) into the oven and preheat to 450°F (230°C) for at least 30 minutes. A screaming-hot pot is essential for creating the perfect crust.
Step 5: Bake the Bread
Carefully remove the hot Dutch oven from the oven. Lift the dough using the parchment paper and lower it into the pot. Cover with the lid and return to the oven.
- Bake covered for 30 minutes
- Remove the lid and bake uncovered for 15–20 minutes, until the crust is deep golden brown
Step 6: Cool Before Slicing
Remove the bread and place it on a wire rack. Let it cool for at least 30 minutes before slicing. This allows the interior to finish setting and keeps the crumb from becoming gummy.
What Makes This Bread So Special?
- Ultra-crispy crust that crackles as it cools
- Soft, airy interior with beautiful holes
- No kneading required
- Minimal ingredients, maximum flavor
Tips for Perfect Crusty Bread
- Use parchment paper for safe and easy transfer
- Don’t rush the resting time—flavor comes from patience
- A darker crust means deeper flavor, so don’t be afraid of color
Final Thoughts
This Dutch oven crusty bread proves that incredible homemade bread doesn’t have to be complicated. With time, heat, and a little trust in the process, you’ll create a loaf that looks and tastes like it came straight from an artisan bakery.
Once you try it, this recipe will become a forever favorite—simple, reliable, and deeply satisfying.
If you want, I can also rewrite this in SEO-optimized, Pinterest-style, or short viral recipe format. Just tell me 